kickstartDS CLI

About
The kickstartDS CLI helps ease everyday tasks when working with Design Systems, especially when building on and with kickstartDS.
It currently supports two main categories of commands:
- Schema: Generate TypeScript types for components, or dereference component JSON Schema
- Token: Initialize Style Dictionary using Branding Token, or build prepared Style Dictionary platforms and formats for your token set
Commands can generally be divided into the following types:
- Commands that thinly wrap other APIs or tooling for you (for example Style Dictionary commands within the
tokenscategory), enabling zero-config use when following our recommended structure for your project - Commands automating tasks for you (for example creating TypeScript types for your components, or dereferencing them, within the
schemacategory), which helps keep your project free from scripts for those tasks - Commands meant to reduce the amount of scaffolding you'll have to write manually. We're currently working on those!
We generally strive for all the commands to work with zero config when following the project structure outlined in our documentation for your own Design System (it's also the same one used in our starter). But we also try to expose options to change those values as needed, you shouldn't ever need to follow our structure. If there's an option that's missing for your use case, feel free to contact us so when can add it!
We also include support for shell completions. Though those will probably still need some more intimate knowledge with your terminal and shell setup, they can be a nice addition to explore available commands and options!
Installation
You'll need to have Node.js installed to use our CLI, see our page about the expected environment when working with kickstartDS for details.
kickstartDS CLI has to be installed for use with Node.js, which can be done through all the common package managers. You can either install it globally, or as a dependency of your Design System project.
Install in project
Installing the CLI as part of your Design System projects helps keeping the version used across your team and consumers consistent. We generally advise going this route, and wiring up your local package.json scripts entries to those commands for isolation.
Have a look at part 2 of our main guide "Create your Design System", for a more detailed explanation of this setup.
Alternatively you can use the CLI directly, without installing it, by using npx, like this:
_10npx tokens init
Learn more about npx as an option to run commands globally, without installation, in the npm Docs.
Install globally with npm or Yarn
kickstartDS CLI is available as a npm package. If you have Node.js available, you can install it by running:
_10npm install kickstartds@latest -g
or if using Yarn:
_10yarn global add kickstartds
If you're encountering problems with this, or for more details on the technical setup needed to work with kickstartDS, see our Getting Started page about the environment needed.
Install as a part of a kickstartDS Design System
This is the preferred way of integrating the kickstartDS CLI into your workflow. It gives you the ability to fix the version of the CLI in use to the exact corresponding kickstartDS package versions, added as a dependency to your Design System. It also allows using the CLI in multiple projects, without those interferring with each other through a globally installed, shared dependency.
All that said: we're being really careful with changes to the CLI, so it should only ever need to be upgraded when changing to a new breaking release of kickstartDS itself. You might still want to upgrade earlier to get access to fixes (X.X.3) or new features (X.2.X). See our page about Upgrading to learn more about our release process, and our versioning scheme!
The preferred way to install the CLI to your Design System project would be as a devDependency.
_10yarn add -D kickstartds
See the following code snippet for an example of a typical (abridged) example of a package.json for a Design System project utilizing the kickstartDS CLI:
We have @kickstartds/base as our main kickstartDS package dependency, and kickstartds (the kickstartDS CLI) as a devDependency. We also include React to complete our dependencies, while chokidar-cli and npm-run-all help us glue together kickstartDS CLI commands with our local scripts entries, as the remaining devDependencies.
There are three integration types at play here: 1. Wire up a script entry to a CLI command directly (optionally setting parameters as required), 2. Run select scripts in parallel (using npm-run-all) to improve DX, by grouping commands commonly used together, and 3. Watch for file changes, to subsequently trigger a script entry... enabling a watch / hot reload mode (using chokidar-cli).
For a more detailed description of what all those commands do, have a look at our "Create your Design System" guide.
Getting started
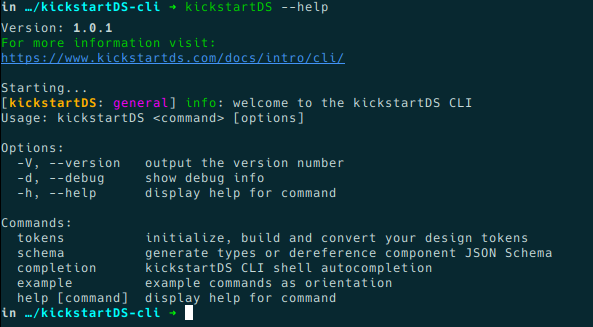
Once you've installed the kickstartDS CLI, you can verify everything works as expected by running the following command:
_10kickstartDS --help

You'll notice the version of the CLI used is part of the logs, written by every command you run. This can help narrow down problems when debugging errors. You can also get the version by calling --version directly:
_10kickstartDS --version

The CLI should generally be pretty explorable by itself, so feel free to just follow the output provided by --help to find out about about commands, options, etc.
There are some general options that can be included with every command, and you can integrate the CLI with your terminal / shell, too. We'll explore both in the two upcoming sections.
General options
The following options each influence how your command will be run, and can be used with all commands included:
| Option | Default Value | Description |
|---|---|---|
--debug | false | Adds additional debug output to the logging |
--rc-only | true | Don't quote the user for input, read from environment and parameters |
--revert | false | Inverse of the command, useful for reverting unwanted changes |
--cleanup | true | Clean up temporary folders used first |
If an option is not set the default value will be used for it. To learn more about --cleanup, --revert and --rc-only have a look at the features section below.
Setting up shell completions
You can set up local shell completions for your terminal by simply calling the completion install command:
_10kickstartDS completion install

You can also remove completions again by using the inverse completion remove:
_10kickstartDS completion remove

We use omelette under the hood to enable the completion features, see their section about Automated Install for details on how this is achieved for different shell flavours. This can be especially helpful if something is not working out-of-the-box for you!
Shell support
This is a really early feature. As there are a lot of different terminal and shell combinations out there, we pretty much expect this to still be pretty unstable, because it is not widely tested.
We'd love to hear your experience (Did it work? Did it to what you expected?), so we can continue improving this!
Features
Next to General options there's also some more general features in use throughout all CLI commands. Read through the following paragraphs for details on those features, what they're used for, and how you can use them.
Interactive prompts and .rc files
Though not in use for the basic commands implemented currently, every command can specify a corresponding .rc file to set options to be used by default. If not using .rc files (this is toggled through the general option --rc-only, true by default), or if the .rc file is missing some required parameters, you'll be prompted for those interactively.
To have a reliable structure when doing this, and to easily provide defaults when omitted, we've opted to add JSON Schema definitions for all of our commands. This is the one defining kickstartDS tokens compile: https://github.com/kickstartDS/kickstartDS-cli/blob/next/.tokens-compilerc.schema.json
There's also a base config included for every command, which provides the defaults in case --rc-only is supplied without a local .rc file in your project, or if that .rc file is missing some values. This is the one corresponding to the default .rc file for kickstartDS tokens compile from above: https://github.com/kickstartDS/kickstartDS-cli/blob/next/.tokens-compilerc.json
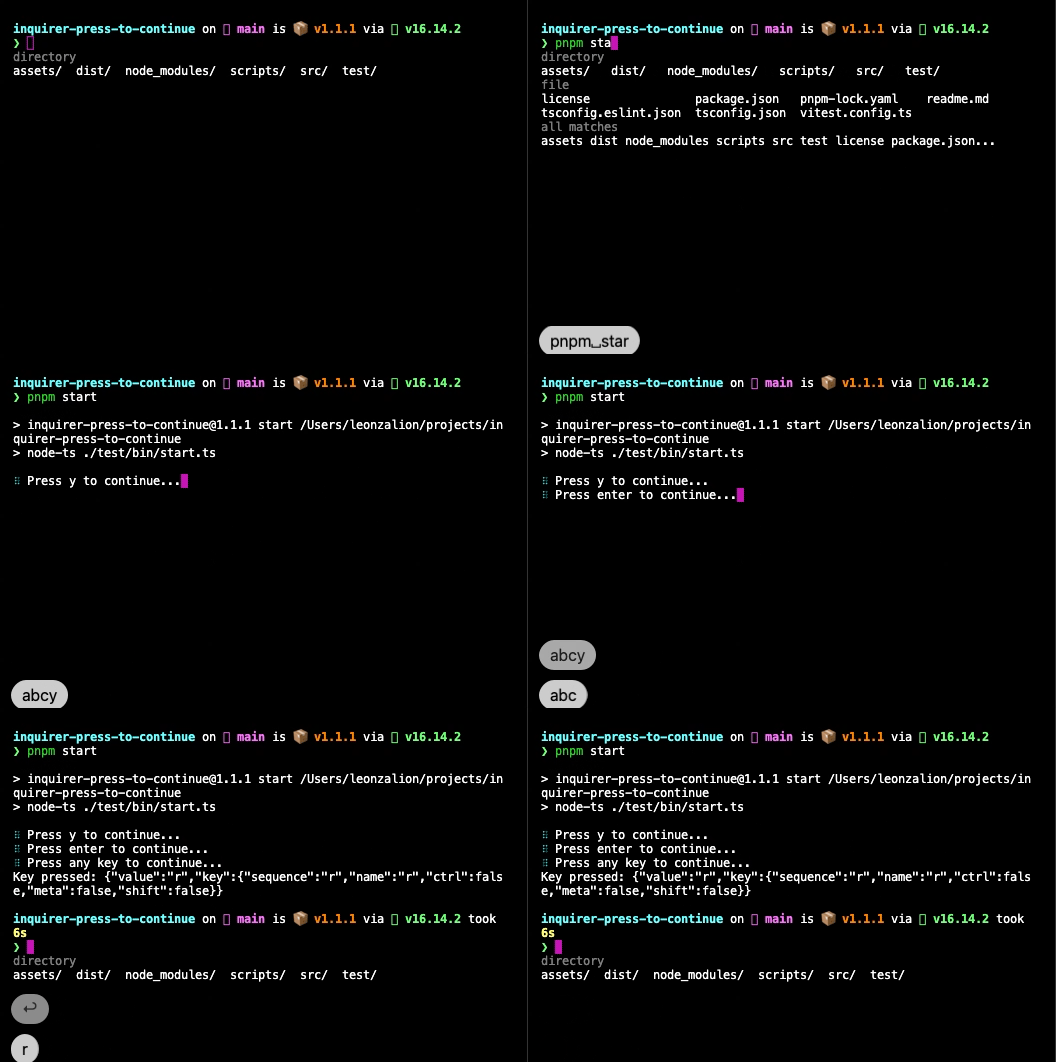
Interactive prompts for commands are generated dynamically based on the supplied JSON Schema, using name, type, default and description from the definition, to help make useful choices. Especially type is used to present prompts semantically, using Inquirer.js. Defaults are first pulled from your local .rc file (even if using --rc-only set to false, to have better contextual defaults presented to you), and then the fallback .rc file provided by kickstartDS.

e.g. https://github.com/leonzalion/inquirer-press-to-continue
This setup provides a scalable approach to creating commands that can both work in a zero config way, while also being able to overwrite configuration (even if only granularly)... even in the most complex scenarios. It also allows persisting your configuration as part of your repository, so you can always repeat the exact process, or review the choices you made when running something like kickstartDS tokens init.
Temporary folders
Everything needed to complete a command will be copied to a temporary folder, first. Results will then be copied back to your project / execution context if, and only if, the command that was run completed successfully.
This ensures changes will be done in isolation, in a controlled environment. Additionally this avoids corrupting your project with output resulting from a failed command.
Every command and subcommand combination uses a unique folder name combination to avoid conflicts when mulitple commands are run (e.g. tokens-init-init-task for the init subcommand of the tokens command).
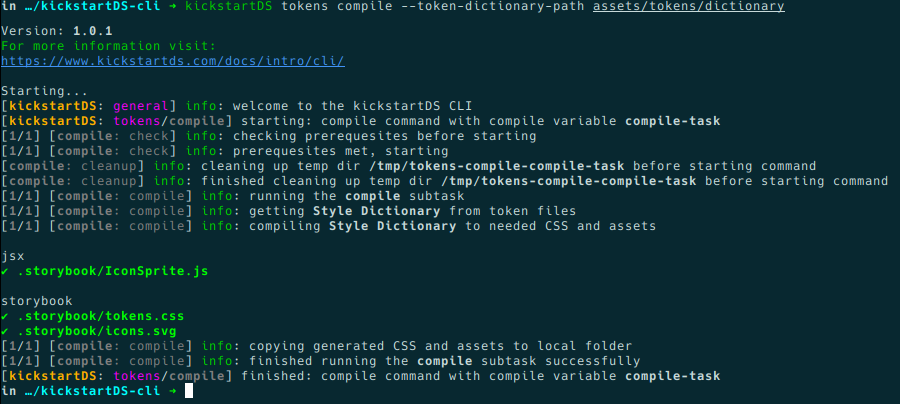
The exact location of the temporary folder used depends on your OS, but it should be part of the log output when running a command... e.g.:
_10[init: cleanup] info: cleaning up temp dir /tmp/tokens-init-init-task before starting command
Here /tmp/tokens-init-init-task would be the temporary folder in question on a Arch Linux OS (for macOS this slightly differs, for example).
Revertability
We strive to implement a corresponding revert / rollback variant for every command, behind the --revert switch. This in part works by using the aforementioned temporary folder.
While having such a general structure in place is necessary, it's also required to write commands in a way that the original starting point is preserved inside the temporary folder. This is something to be done by the author of new commands, and needs great care!
Additionally, having a --revert variant available may not always be feasible or sensible. Those commands not having such a variant will be explicitly marked, including a short reasoning for not implementing it.
Currently testing
The --revert variants of the tasks implemented so far are currently being tested. If you're stumbling over one not working as expected, please feel free to open an issue on our Github.
Available commands
As hinted at before, commands are generally split into categories by some shared concept or use case. We currently have categories for Design Token (token) and JSON Schema (schema).
Token category: Commands around working with your Design Token set.
| Command | Subcommand | Description |
|---|---|---|
tokens | init | Initialize your Design Token set from Branding Token |
tokens | compile | Compile your Design Token set into all configured Style Dictionary formats / outputs |
tokens | tofigma | Sync your Design Token set to Figma (work in progress) |
Schema category: Commands around working with your JSON Schema.
| Command | Subcommand | Description |
|---|---|---|
schema | types | Create TypeScript types matching your components JSON Schema |
schema | defererence | Dereference JSON Schema files for easier consumption |
Both categories and their subcommands will be described in a bit more detail below.
Design Token commands
Commands in this category are used to deal with every type of token present in your Design System. Namely Branding Token for initial token set generation, Design Token managed in Style Dictionary, and Component Token used by your components.
For a detailed setup guide for everything related to Design Token, give part 2 of "Create your Design System" a visit.
tokens init

Initializes your Design Token set from a Branding Token file. Includes options to specify a specific file path for your branding token file (--branding-token-path), and a path for the dictionary (--token-dictionary-path), to set the location to store your Design Token set.
See the section "2. Design Application" > "Initialization" of our main guide "Create your Design System" to learn more about this setup.
Available options:
| Option | Default | Description |
|---|---|---|
--branding-token-path <file> | src/token/branding-token.json | relative path from project root to your branding token file |
--token-dictionary-path <directory> | src/token/dictionary | relative path from project root to your token dictionary |
Default values are in alignment with the main guide, its corresponding repository, and the starter project. Which means in those cases, or if just following our best practices, you'll be able to use the subcommand without specifying any special options.
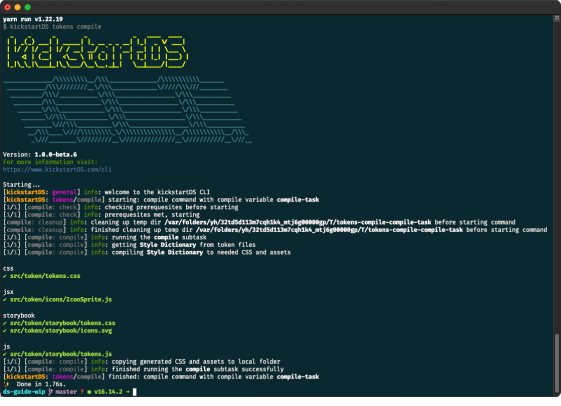
tokens compile

Takes your Design Token set (a collection of JSON files in Style Dictionary format), and compiles them to a set of different output formats.
Internally a configuration file for Style Dictionary (sd.config.cjs format) is included, that defines a base set of formats (jsx, storybook) to be used when no local configuration file is found in your project. You can find the responsible code for this here in our repository, for reference.
The resulting files are saved to the locations specified (per format) either by the included Style Dictionary config, or by the one provided inside your project (sd.config.cjs), the location of your Design Token set you can use --token-dictionary-path.
See the section "2. Design Application" > "Compile Design Token set" of our main guide "Create your Design System" to learn more about this setup.
Available options:
| Option | Default | Description |
|---|---|---|
--token-dictionary-path <directory> | src/token/dictionary | relative path from project root to your token dictionary |
Default values are in alignment with the main guide, its corresponding repository, and the starter project. Which means in those cases, or if just following our best practices, you'll be able to use the subcommand without specifying any special options.
tokens tofigma
Takes your Design Token set (a collection of JSON files in Style Dictionary format), and syncs them to a clone of our Figma token file.
You can configure the location of your Design Token set by using --token-dictionary-path.
Work in progress
This command is currently work in progress. It will support syncing your Design Token set / Style Dictionary to a copy of our Design Token template for Figma. When this command is finished, we'll add the other direction (fromfigma), too. This will enable you to always keep Design Token in sync between code and design!
Status: JSON Schema matching our Figma template down to every label, layer and description. Can already be used to validate the structure of a Figma file. Next up will be pulling the values out from the Figma template instance, to transform and write them to your Design Token set.
Available options:
| Option | Default | Description |
|---|---|---|
--token-dictionary-path <directory> | src/token/dictionary | relative path from project root to your token dictionary |
Default values are in alignment with the main guide, its corresponding repository, and the starter project. Which means in those cases, or if just following our best practices, you'll be able to use the subcommand without specifying any special options.
JSON Schema commands
Every component based on kickstartDS includes a JSON Schema definition for its component API. Commands in the schema category help transform those definitions into other helpful formats like TypeScript types, or deferenced versions of the schema.
schema types

Generate TypeScript types for your components, matching your component API / JSON Schema exactly. These types can then be used when implementing your React template, providing a stable base to rely upon. Generated type definitions are put alongside the JSON Schema files, into the components directory.
You can set the path components are placed inside your Design System using --components-path, if you're not using the directory structure presumed in our guides, examples and starter. You'll always have to provide a domain that is used in your JSON Schema definitions by specifying --schema-domain (e.g. --schema-domain schema.mydomain.com).
See our component example guide "Adapt Button component", especially the end of section "JSON Schema definition" and the subsequent section on the "React template" for an example of this at work.
Available options:
| Option | Default | Description |
|---|---|---|
--components-path <path> | src/components | relative path from project root to your components directory |
--schema-domain <domain> | schema.mydomain.com | domain used in your JSON Schema $id fields |
Default values are in alignment with the main guide, its corresponding repository, and the starter project. Which means in those cases, or if just following our best practices, you'll be able to use the subcommand without specifying any special options.
schema dereference

JSON Schema definitions for component APIs can (and often do) include references to other component definitions. This is done by the way of using a $ref in one of the properties, or by using advanced workflows involving allOf, anyOf, oneOf and so forth.
Because we generate Storybook Controls and documentation for all of the properties of a component (including the referenced ones), we use this command to "dereference" all of those keywords. This results in a dereferenced version of the JSON Schema with all references resolved and inlined. This can then be used then without involving complex, or computationally expensive, conversions on the client.
You can set the path components are placed inside your Design System using --components-path, if you're not using the directory structure presumed in our guides, examples and starter. You'll always have to provide a domain that is used in your JSON Schema definitions by specifying --schema-domain (e.g. --schema-domain schema.mydomain.com).
Follow the links to learn more about the integrations we provide for Storybook in general, or Storybook Controls specifically. See the following example on Github to see such a dereferenced schema at work.
Available options:
| Option | Default | Description |
|---|---|---|
--components-path <path> | src/components | relative path from project root to your components directory |
--schema-domain <domain> | schema.mydomain.com | domain used in your JSON Schema $id fields |
Default values are in alignment with the main guide, its corresponding repository, and the starter project. Which means in those cases, or if just following our best practices, you'll be able to use the subcommand without specifying any special options.
Usage in CI/CD
Using the kickstartDS CLI as part of your CI/CD should be pretty straight-forward. If you went the "Install as a part of a kickstartDS Design System" route, you only need to make sure to include all the needed environment variables for your build to work (stuff like NODE_ENV=production), the rest will be managed by npm.
If you installed the CLI globally, you'll additionally have to make sure it will be installed in the environment used by your CI/CD when building, too! This can be done by simply adding a line installing it before the actual build command is triggered (like yarn global add kickstartds).
Tips, Tricks and Gotchas
This section will cover some useful information that should help when working with the CLI. It ranges from tips on how to recover from errors to how you can debug a CLI command not running correctly.
Recover from errors / problems
If something failed, or was broken by running a CLI command, you can always have a look at the generated temporary folder. All processing will be done in such a temporary folder, only at the end copying the generated result back to your project folder / execution context on success.
In case something went horribly wrong, you can always look up that folder to potentially recover your previous state.
See the section above about temporary folders for details.
Debug long running commands
Some commands might be long running in the future. If it's a specific step, pretty late in the process, that fails, you can consider setting --cleanup to false. This should then pick up your command from the last known state when running again, based on the involved temporary folder.
This can be especially useful if that last step only failed because an API wasn't available for a short time frame, or something comparable.
Getting support
To get support, you can always have a look at the issues on our Github repository, or open one yourself if you've stumbled upon something broken or incomprehensible. When doing so, make sure to always include the log output of the command run. Especially the kickstartDS CLI version number used, part of that output, is of interest here!
You can also join us on Discord. And if that's not your cup of tea, you can reach out to us:
- Through the chat widget, included in all of our public facing websites
- By writing us an email
- By joining us on Twitter
- By writing us on WhatsApp
Contributing
Unless you explicitly state otherwise, any contribution intentionally submitted for inclusion in the work by you, as defined in the Apache-2.0 license, shall be dual licensed as below, without any additional terms or conditions.
There's one additional command included with kickstartDS CLI, not mentioned before. It's the demo subcommand of the example command, which is just included as a reference to be used when creating new commands. This ensures having the basics in place, and helps you get started way faster!
References
Building a CLI with this range of features wouldn't have been possible without a solid foundation to build upon. We'll list our main dependencies here, to give you an idea of the general tooling in use:
| Dependency | Link | Description |
|---|---|---|
| Inquirer.js | https://github.com/SBoudrias/Inquirer.js/ | We use Inquirer.js to dynamically generate context-sensitive prompts based on the commands JSON Schema. |
| Commander.js | https://github.com/tj/commander.js/ | Commander.js serves as the foundation for isolated implementation of the different commands, and provides CLI option handling. |
| Omelette | https://github.com/f/omelette | Omelette provides auto-complete features and a managed shell integration |
| ShellJS | https://github.com/shelljs/shelljs/ | To have consistent behaviour (over macOS, Linux and Windows) when interacting with shell features inside of commands we use ShellJS. |
| winston | https://github.com/winstonjs/winston | Everything related to logging is handled by winston. It provides the structure for having multiple transports, writing to the prompt, files, etc. |
| Chalk | https://github.com/chalk/chalk | Nice colors that work across as many terminals and shells as possible made possible by Chalk. |
| Simple Git | https://github.com/steveukx/git-js | Nice abstraction upon Git, with a nice API to wrap Git related tasks with. |
| Nunjucks API | https://mozilla.github.io/nunjucks/api.html | Mighty and expressive templating engine, we use the render method provided by the base API primarily. |
| Nunjucks Templating | https://mozilla.github.io/nunjucks/templating.html | This is the heart of Nunjucks, used for consistent and efficient templating of all kinds of templates. |
This can also serve as a great source of inspiration when trying to identify easy to implement extension opportunities for features, commands or options you feel currently missing!